Friday, July 13, 2012

My kiddos LOVE to be involved and get the chance to help out on Sunday Mornings, and I love to train them to have a servants heart!  


Sometimes I reward them for their help with candy, but then they are cleaning for the incentive's and not from the kindness of their heart if I do it too regularly.


So I decided to make this container, and put a Popsicle stick for each child into the container.  Then every time that I need a helper, I just pull a stick out and ask that student to do the job.  This way, I am not playing favorites with the children on accident because I call on the ones that raise there hand, and not on the ones that are too shy to do so.  If I call on a child that really does not want to help, I can just simply put there name aside and call on someone else.  Maybe something like this would work for your service too! 


Supplies:
- a small container (I found mine for a dollar at the dollar tree)
- Popsicle sticks (I also found a bag of a hundred colored ones there as well!)
- Marker
- Paper
- Tape
- Any designing tools that you may want to use for your container!


I just made a label that would fit the container, and attached the paper with some glue first so it would stay on the container, then I wrapped the container with tape to secure the label.  Then I just added a Popsicle stick for each of my kiddos to the box. I put the left overs in a save place for when I have new kids come so I can add them as well!


 (I also wrote on the top of the container so its clearly labeled)


Hope this works for you, or gives you an idea of how to make it work! 

If you have any questions or concerns, please feel free to comment! 
Thanks (:

This Idea was found and adapted from Pinterest.

I have 30+ 4-6 year old children on any given Sunday with few helpers.  (Thank you God for a patient heart!)
Anyways, as many of you might already know, when you get together that many children it is very hard to keep them in order, let alone quiet.  I don't mind the noise during play and craft times, but during story time, it makes it hard to actually teach the kiddos.

So.... I adapted this craft from a blog on Pinterest and it works out well for me, so I hope it works out for you too! All it is is a decorated spray bottle that the kids think has the ability to keep them quiet.  (younger kids really believe it too!)

Supplies:
-Empty Spray Bottle (could be used or bought new from the Dollar Tree for cheap)
-glitter, paint, sequins, sand, marble
-Paper
-Tape

(excuse the messy table, I was hard at work!)

Start with just the bottle you are using, and add the marble, sequins, sand and glitter into the bottle.
You can use any combination of these Items, basically they are to help move around the paint and cover the inside of the bottle with it.  The sand/glitter helps to have the paint stay on the sides and the marble helps to move it.  The sequins are good to make it "sound as if there is something actually in the bottle that makes the kids stay quiet.

Then you have to add the paint into the container, one color at a time.  If you add them all at once, the colors combine together and then you get a brown yucky color.  I used acrylic paints I already had, but I think tempra paint would work fine too. Any colors work, I just went with bright colors that popped!


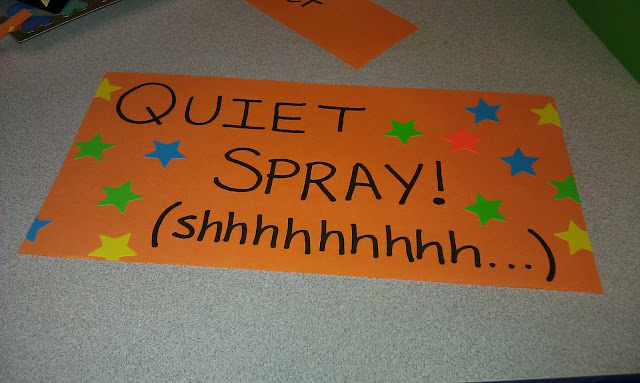
Last, after it has dried and you can put the lid on it, you can create your sign for the bottle!


Just simply tape this to the bottle so that it looks like it is an actual label.

Finish product "sounds" like it has spray in it, and is really empty.  I suppose you could also use water in it after it dries to create a mist that you spray towards the students, if they need something more visual and you felt comfortable with that.

Once the child has "Quiet Spray" on them, they should no longer be able to "be loud"! I only use it during the story time so that the effect is stronger.  

Hope you get this to work out well!
If you have any questions or concerns please feel free to comment!

Thanks! (:

Thursday, July 12, 2012

Craft: 

  •  "Paper Doll" Samson
    • Supplies:
      • Yarn
      • Man Coloring Page
      • Card Stock

I created an Outline of a plain paper doll with no gender, and then made copies on card stock so that when it is cut out, the kids can make it stand up.  The idea is that they get to draw Samson on the plain outline and then glue on his very long hair, as a before his hair was cut and he was still very strong figure.  
I did not have any brown yarn, so Samson gets to be blonde! 


They cut it out, glue on the long hair and then use it to play out the scenes from the story.


Object Lesson: 

  •  Honey and Bread

In my Sunday Class we always do a snack because the children have been in Sunday School and when they get to my class they need a break and a refresher.  Well for this particular lesson, our snack gets to be a part of the story! 


Because in the Bible story Samson uses some honey from a bee hive and shares it with his Parents.  We are using two loaves of bread and a cup of honey so that the kids can taste exactly what Samson tasted. 


You could also just simply use a gram cracker or a pretzel stick dipped in honey, or just have them taste honey and guess what it is.  


Games:


- "Samson" Says:
Instead of Simon Says, and you can use things from the story to play "Samson says to eat honey", "Samson says to pretend to be angry", and so on. You can add in Simon says classics as well if you need to make the game longer.  


-"Bee Hive" Walking Tag:
This is like tag except a lot safer.  In the center of the room, place a yellow cloth (sheet, towel, or shirt if you need to be creative) or a Drawn out actual Bee Hive if you have time and materials to do so.  Then, Have all the children WALK around the room "buzzing and flying" like Bees while you, or an adult helper, acts as the "Bee Keeper". When you tag them, they have to go to the Bee Hive in the center of the room and sit and wait until everyone has bee tagged and sent back.  


Wednesday, July 4, 2012

This is a fun game for VBS, a summer picnic or just a way to pass time with your children!

Supplies Needed:
- Shower Curtain or tarp (Dollar Tree sells plain colored curtains for only a buck!)
- Tape
- Frisbees, rings, or an item to throw at the tic tac toe board

Lay out the curtain and then tape the lines equally out in the design of a tic tac toe board.


I had these rings from a Twister Game donated to the church that worked great!

We played a review game with it, so it was really good because it allowed the kids to have fun and learn.

Please feel free to comment with any questions, thoughts or concerns!

Thanks! (:


This Idea was found and altered from http://www.aturtleslifeforme.com/search/label/teacher

Monday, July 2, 2012


Although this story is a little advanced for my Pre-Schoolers, I believe that they can handle it (and so does my lesson curriculum).

This week is the story of how God asked Gideon to lead an army against the Midianites but they wanted a smaller army so only 300 soldiers went up against the Midianites in the end.  The 300 showed up at night, with a trumpet and a jar with a torch after Gideon learns the Midianites are afraid.  Then they took out the torch and blew their trumpets and scared the Midianites.

As a craft, I could not make trumpets two weeks in a row, So I planned on making torches this week, and they can cup their hands around their mouth to make the trumpet noise at the appropriate time. 

The Craft Supplies:
  • Brown paper for the torch part
  • Red, Orange, and Yellow for the flames
  • Scissors
  • Glue/Tape


Next:

Cut the brown paper into triangles that look like cones - I got about 5 from each piece of brown paper


Then: 
use the red, yellow, and orange papers to cut "flames" for the top of the torch.  The flames can be in many different shapes, as long as they have tips on them.  I used 2 sheets of each color and it was plenty enough for 20+ preschoolers.


Finally:
Instruct the children to glue the flames to the top of their torches.


I did this with my kiddos and they were very quick with it and loved that they got to design their own torch flames.  They took maybe 10 minutes in total and I would put the difficulty level at about 1/5 for preschoolers.  If they are older children, you may want to let them cut out their own material, to take up more time and to allow them to make the torches more unique. 

Please leave any comments, thoughts or concerns bellow! 

Thanks! (:

Sunday, July 1, 2012

So, as many parents and workers with pre-school aged children know, they should never be allowed to play with fire! However, they feel out of the loop and sad when they see older kids getting to have sparklers and fireworks that they cannot.  That is why I decided to have a second craft this Sunday so that the kiddos could have a safe sparkler to play with.

The idea was found and tweaked from Pinterest.

Material needed:
- tape
- red white and blue paper
- wooden rods (found at Walmart - $1 for 16)
- fourth of July tinsel  (found at the dollar store - $1 for 25 feet)


Instructions:
- choose a design for the top, I could not find a star dicut so I used this one:

- Wrap the rod with the tinsel and then attach one large star or "flower" in one color, and then one smaller one of the other two colors on each side. I used tape so that the kids could not destruct them as much due to how long glue takes to dry fully, but glue would probably last longer and be more effective in the long run.  

Finished product:


Hope this works well for you!

Please feel free to comment with any questions or concerns!

Thanks! (:


Monday, June 25, 2012

As you know in this story they march around the walls of Jericho sounding trumpets/horns and shouting for seven days.  A good craft for pre-school aged children is to make a horn for them to use at the parts in the story where a horn is mentioned. 


Supplies Needed:
- Markers
- Scissors 
- Tape 
- "Gold" (Yellow) paper 


First:
Allow the kids to decorate their trumpet any which way they choose to, or if you want you can have them make it really look like a trumpet.


Next:
Roll up into a cone shape and place a piece of tape on the bottom part to hold it together.  Also, it is good to put take around the mouth part to keep the kids from getting the end wet and soggy from spit.  (I didn't think it would be a problem, but some of my kids really liked to put the whole end in their mouths). 


Then I used our carpets as the edges of the walls of Jericho and had half of my kids line up as the wall, while the other half marched around and blew their trumpet at the appropriate times.  Then I switched so everyone got a turn.  


They LOVED it! 


Please feel free to comment with any questions or concerns! (: 

Thursday, June 21, 2012


"Then, what exactly are we supposed to teach children? What is important for them to learn? The answers to these questions differ based on one’s context, faith tradition, and cognitive abilities. But I believe that, in general, children ought to learn about the great texts of the Christian faith (with a particular focus on the life and teachings of Jesus), the Christian tradition or denomination in which they participate, and current events and issues that affect the life of the church and the world."

- David M. Csinos

Guevara, Matt (2012-03-11). Nexus: Central Themes in Children's Ministry (Kindle Locations 94-97). What Matters Now. Kindle Edition.

Nexus: Central Themes in Children's Ministry


This book can be found at:
http://www.amazon.com/Nexus-Central-Childrens-Ministry-ebook/dp/B007JL627I/ref=sr_1_1?ie=UTF8&qid=1340325037&sr=8-1&keywords=nexus+central+themes


I completely agree. Often we focus more on the Old Testament because the stories can be made into simplistic ideas that seem appealing to children (i.e - Noah's Ark, Moses and the Red Sea). But really, the concepts that are most important for kids and teens to grasp and understand are often the ones that come from the New Testament and center around the life and teachings of Jesus. What I am not saying is that the Old testament is less important than the New Testament to teach to kids because they should know ALL of the bible, but when it comes to the hard stuff, the concepts children struggle with understanding and personalizing, often they are found in the New Testament, which means more time needs to be spend learning and teaching there.


I think another important thing to teach the children you minister to is Church history, both the history of the church you attend and the Churches of Christianity in general.  This does not mean that they should know who did what, where they did it, and why.  What it does mean is that they understand through the connections you make that the church they see in the New Testament, is linked to the church they are in now.  They need to personalize the concept that the Jesus in the bible is the same Jesus we know today, and that the concepts are still true.  


We need to not be afraid to approach the hard topics in the Bible, because they are the most important for children to understand. Things like, death and sex are really tough to talk out with kids. What should they know about these topics? What is age appropriate for them? How much information is too much? 
These are all genuine questions when we come to these topics that require discernment of maturity and understanding.  


If you have any thoughts or concerns, please feel free to leave a comment! 


Your Daughter Needs a Hero

Your Daughter Needs a Hero 

By: Maria C. Furlough


I was recently blog searching and came across a post for this book.  In that post featured on epicparent.tv, Maria talked about how she was insecure as a teen and how her parents could have helped with the issue. (post found at  http://www.epicparent.tv/young-women-insecurity-and-a-book-give-away/#more-5264)

The reason this book is worth reading is because ALL girls struggle with this issue in some way at some point and MOST parents do not know how they can help with the issue.   It is not that parents do not want to help or try to help, its simply that they often do not know what the right and wrong things to do and say are with this issue.

Thanks Maria for writing a book that tackles a major issue with Children, Preteens, and Teens today!


You can purchase this book at Amazon:
http://www.amazon.com/Your-Daughter-Needs-Maria-Furlough/dp/161346794X/ref=cm_cr_pr_product_top

Also, Check out Maria's Ministry Site:
http://www.trueworthministries.org/


Monday, June 18, 2012

This craft would be for older aged children to go along with a story about how Jesus is the light.  


*I have not done this yet to be able to post my own pictures because I work with younger kids and this would be too complex for them in a large group (may work as an at home project with little ones) * 


The story would consist of the verse "Jesus answered, "I am the way and the truth and the life. No one comes to the Father except through me." John 14:6 


After they have heard that story and no the verse, you can walk them through this craft as a good reminder "night light" to keep.  


Supplies:
-Hammer
-Nails 
-empty cans (Pre-frozen with water) *

*in preparing, to avoid the bottom of the can bubbling out, you can place about 1/4 to 1/2 an  inch of sand first

Preparation: 

Peel the label off of a can, fill with water and freeze in the freezer (sand first to avoid the bulge) . After you freeze, you can write Jesus on the can, with whatever design in crayon or washable marker (you will want to be able to wash it off basically so afterwards you don't see the design).

Then you can help the children (or choose to do so in advance) to nail holes in the design.  After that, you can thaw the can in hot water and dry off.  Once this is done, you can let them decorate the outside with stickers or markers so that in the daylight it has a design as well. Then give each child a tea light to put in the bottom of the can so the light can penetrate through the holes and light up the surrounding area.  

I found this idea and adapted it from this website: http://www.charlottehupfieldceramics.com/2011/05/30/diy-tin-lanterns/, who found it from Sophie’s blog – Trinket Box, who originally found the idea from Gem Fatale’s Style Blog


If you have any questions or concerns please feel free to comment! 

Thursday, June 7, 2012

After getting the idea to put paint in bags from Pinterest, I decided to take the idea to a new level to make a ministry lesson from it: Moses parting the red sea.


Supplies:
-baggies with double lock protection (cannot be the zipper kind)
-paint (for this specific lesson red)
-thick masking or paint tape


Start by making the paint bags. 

after filling with about 1/4 cup paint spread the paint out evenly, getting all the air out of the bag before zipping it up. If low on paint, you can add water to your mixture to make the paint last longer. Just make sure that you do not put too much paint or water because then the mixture will separate easily but come back together just as fast. 
I used about one 12oz. bottle for 6 gallon bags. 


Next:
Tape all for sides to the table, adding an extra strip of tape to the top of the bag just in case the top of the bag opens. 


Last: 
For the lesson have the children use a marker or a flat, non sharp marker and press down the middle to "part" the sea.  Make sure that they do not use their fingernails or anything sharp or you will get a hole in the bag.  


Note: If the kids can read you can place a piece of paper on the other side reading "Isrealites" or even "Moses" so that when they part the sea they can see who was able to cross it.  


After you are done with the object lesson, the children can write or doodle by pressing their finger on the bag. When you are done, you can simply remove the tape and store the paint bags until you need them again or want to bring them out for a fun play idea later, or you can just use the paint in the bags for finger painting by cutting a corner and squeezing out its contents back into the bottle.  


Hope this works as well as it did for me for everyone else! (:


- Ally <3